Sunday, March 31, 2013

Happy Easter!

 
These two photos are from Easter 2003.  We have always celebrated Easter, with dyed eggs and bunny-shaped bread, decorated by the boys, of course.  We had bunny rolls decorated with raisins in 2003. 


In 2006, Jon created our Easter Breakfast. Bunny-shaped pancakes with his own special topping. At age 8, this was his first food creation and very delicious and enjoyable. For my family, much more tasty than store bought candy. Here is his recipe.


Jon's Pancake Topping:

2 organic apples, diced (not peeled)
2 Tbl pure maple syrup
1 tsp cinnamon
dash of nutmeg
1/4 cup chopped pecans (optional)

Place apples (and nuts) in bowl, sprinkle on spices and drizzle on maple syrup.  Stir until all apple chunks are coated.
 
So much fun can be had without the sugar.  Easter egg hunts always included special treats, little trinkets and coins, plus a few healthy foods such as little boxes of organic raisins and baggies of things like the chocolate energy chunks and sesame sticks


If your Easter is a bit more sugary than this, be sure to get some chicken broth cooking on your stove and make some healing chicken soup to ward off infections next week.  Refined sugar feeds germs and lowers the immune system - have you noticed someone always seems to get sick after a holiday feast with sugary sweets?
 
 
Our Easter eggs come from our own chickens since we moved to the country.  And sometimes a hen decides to sit on some eggs.  One of our chickens went broody last spring and she hatched a brood of baby chicks under the gazebo! 
 
May you be blessed abundantly this Easter 2013.  
 
 “Don’t be alarmed,” he said. “You are looking for Jesus the Nazarene, who was crucified. He has risen! He is not here. See the place where they laid him."  Mark 16:6

Saturday, March 30, 2013

Healing Chicken Soup


I was not sure what to call this soup recipe - healing, savory, soothing, satisfying or amazing.  It is all of these things.  I love it when a food can be so nourishing and healing, while also delicious.  This is definitely a recipe you need to try and make a regular part of your diet.  If you have a chronic infection or bowel problems, you need to have this soup or something similar with homemade broth daily, while also eating 100% God's foods for complete healing.  The key to this soup's healing power is the homemade bone broth and the fresh herbs.  Don't skip either if you are using this soup for medicinal purposes and not just enjoying as a lunch or dinner meal.  It is also a great meal choice when you are under a lot of stress or feel your immune system is low.

Ingredients (I use all organic vegetables):

1 yellow onion, diced
2 - 6 cloves garlic, minced (use more when fighting an illness)
1 tsp grated fresh ginger (optional)
4 - 6 carrots, diced
4 - 6 celery stalks, diced
1 - 2 Tbl extra virgin olive oil

a batch of homemade bone broth (~ 10 cups)
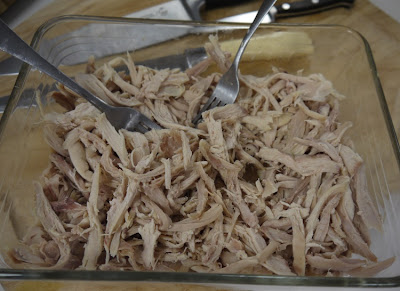
baked chicken, shredded
2/3 - 1 cup long grain brown rice

Dry herbs and spices:
1 tsp organic poultry seasoning
1 tsp coarse sea salt
1 tsp parsley
1/2 tsp freshly ground black pepper
1/2 tsp basil
1/2 tsp oregano
1/4 tsp thyme

Fresh basil, parsley, oregano, thyme or cilantro


Dice the onion, celery, carrots (get a good quality knife if you don't have one).  Mince the garlic and shred the ginger.  In a glass or heavy stainless steel pot (don't use aluminum or non-stick), heat the pot and then coat the bottom with olive oil.  Add the diced vegetables and the garlic and ginger.  Saute for a couple minutes until the onions are translucent.


Then add the homemade bone broth and the dry herbs and spices.  Cover tightly with lid and bring to a simmer. 


Add the rice and the shredded chicken and turn heat down to low. 


Cook covered at a low temperature setting until the rice is done, typically 1 - 2 hours, stirring occasionally.  You can shred the chicken after it bakes by hand or with a fork.  You can also chop up the chicken into bite size pieces by hand.


You can vary the quantity of vegetables, broth, chicken and rice that you use.  Use more chicken for a hearty meal (I use less when fixing for a person who is sick), use more rice for a filling stew type soup, and use lots of vegetables (slowly build up the quantity and size of the pieces of the vegetables you use if your family is not receptive yet to vegetables in their diet).


When the rice is done, chop up fresh herbs that you have on-hand.  You use a much larger quantity of fresh herbs than dry herbs.  I like to use several tablespoons of basil and parsley (or cilantro), a teaspoon or two of oregano, and about 1/2 teaspoon of thyme leaves per pot of soup.  If you add finely chopped rosemary, just use a little (1/4 tsp.)  Fresh rosemary and thyme are very strong and are two fresh herbs to use sparingly in dishes.


Turn off the heat and move the pot off the hot burner.  You can then add the fresh herbs to the whole pot or dish individual bowls and top each with the a little of each fresh herb.


Friday, March 29, 2013

Chicken Stock (Bone Broth)


Chicken Broth:

Making your own chicken stock not only will save you money but it will nourish and heal your body.  One good quality chicken will produce about the same amount of chicken broth that you could buy for the cost of the chicken.  But you also will get the chicken meat.  So when you buy a good quality whole chicken, do not look at the cost as exorbitant because not only are you getting the meat, you  are also getting a lot of stock.  
 
In addition, there is no ready-made chicken broth available for purchase (that I am aware of) that does not contain yeast extract (a hidden source of MSG) which is on the list of foods/ingredients to avoid.  MSG is used to enhance the flavor of meat (for example, bouillon cubes are a cheap stock substitute that get their meat flavor from MSG).  Here is the ingredient list for McCormick beef bouillon cubes:  Ingredients - Salt, Sugar, Monosodium Glutamate (Flavor Enhancer), Hydrogenated Palm Olein, Corn Starch, Onion, Beef Meat, Caramel Color, Artificial Flavor, Disodium Inosinate (Flavor Enhancer), and Spices.

Not only does store bought cartons and cans of broth, and bouillon cubes contain no healing properties, they all contain MSG which is an excitotoxin and an unhealthy ingredient for all person's health (consider yourself lucky if you get an instant migraine from MSG).  If you don't consciously feel the effects, know that it is a toxin that must be cleared out of your body and that has been linked to many serious chronic diseases.

Homemade chicken stock is incredibly easy to make, but plan enough time for it to slow cook (24 hours is best but anywhere from 12 hours to 36 hours works).

Ingredients:

Chicken carcass and all drippings remaining from Baked Chicken
Filtered water
Something acidic (lemon or apple cider vinegar)
Chicken neck and feet (optional)
Carrot (optional)
Celery stalk (optional)

If you are making your broth in the same pot that you baked your chicken, don't bother to clean the pot.  Immediately put the carcass back into the drippings in the pot after you have removed the chicken meat and start your broth cooking.  Tear apart the bones (at the joints) and break up the rib cage.  Next add the neck and/or feet if available.  If you have stuffed the carcass with lemon to bake, that is sufficient you do not have to add anything more that is acidic.  Otherwise add 1 Tbl of apple cider vinegar or two lemon quarters.  You must add something acidic at this point to draw out the minerals and collagen.  If I have an old carrot or old celery stalk, I add this too. 


Fill up the pot to the top with room temperature filtered water and place on the stove top.  Place a lid on tight (not cracked) and bring to a simmer.  If you get scum on the surface, you can skim it off at this point.  Reduce heat to low (you don't want it to boil) and keep the lid on tightly, let slow cook for 24 to 36 hours (a minimum of 12 hours).  You can also make the broth in a ceramic crock pot if you can keep the temperature low enough.  Make sure it does not turn itself off automatically after 4 to 8 hours.


After a long, slow cook time, turn off heat and remove lid to cool.  I usually let it cool about 30 minutes and then with clean tongs, I remove all the bones and chunks.  Then using a strainer, as shown in the photo above, pour the broth into a large bowl.  Cool further, cover with plastic wrap and place in refrigerator to cool for several hours. 


Remove from refrigerator and skim fat off surface (if there is any).  Use your broth to make healing chicken rice soup (tomorrow's post), or put into containers and freeze.  I like to always have some frozen broth in the freezer for emergency illnesses.


The best broth is like jello.  It is hard to find chickens that will produce this quality of broth.  I find that the broth made from good quality turkey carcasses is typically more gelatinous, perhaps because turkeys are more wild and free range better even when feed is available.  I always buy two turkeys at Thanksgiving, one for Thanksgiving and another that I bake around Easter.  Turkeys are so large that you can make twice as much broth from them.  You must not use the standard grocery store turkey, such as Butterball, that is filled with toxins.  Only make broth from your turkey if you have bought a good quality one.
 
Beef Broth:
 
Making beef broth is similar to making chicken broth and equally as nourishing.  Buy 100% grass fed soup bones.  I like to first flour and brown them in a skillet (for improved broth flavor).  I use about three bones per pot of broth.  Place the bones in your broth pot (I use the same glass pot with lid that I use to make chicken broth), plus 2 lemon quarters or 1 Tbl of apple cider vinegar (I prefer using lemons but either is fine).  Also add a carrot and celery stalk.  Place lid on tight and follow the directions above for chicken stock. 

Important Tips:

When making any type stock, be sure to cook with the lid on tight, not cracked so you don't evaporate away all of your liquid.  Also be sure to add room temperature, not hot water, and cook over a low heat (it should not simmer with bubbles) for a long period of time. 
 
Bone broths are extremely healing for gut and digestive issues, and are the first line of defense to bring the gut back into balance.  Bone broth in combination with garlic, onion, spices and fresh herbs (my healing soup) is an incredible immune booster warding off and fighting off cold and flu germs.  Making your own stock is a skill worth learning.
 
Lord my God, I called to you for help,
and you healed me.  Psalm 30:2


Thursday, March 28, 2013

Baked Whole Chicken (for bone broth)


Homemade bone broths are one of the most healing 'medicines' that God has given us and so important for everyone to learn how to make.  The quality of the chicken you use is extremely critical because the healing properties of the bone broth comes from the minerals and other nutrients such as collagen that are drawn out of the bones during the cooking process.  Find good quality chickens and meats.  The best are often from local ranchers and farmers so investigate the links at the end of this post, or purchase a free-range whole chicken from Whole Foods or a natural grocery store, or still acceptable are the organic chicken two packs available at Costco (though these are not truly free range).  The best free-range chickens will have access to green grass and sunshine.
 
Another very important aspect is having a good quality pot/dish to bake your chicken and then to slow cook the broth.  Never use non-stick cookware or aluminum cookware for anything.  Stainless steel is not a good choice either for slow cook acidic foods such as bone broths.  To bake the chicken use an oven proof ceramic baking dish or my preference is a glass pot with a tight fitting lid.  I love my glass pots (4.5 L size shown in photo above) but they are no longer being manufactured so you have to find them at garage sales or on Ebay (a good price including shipping is ~ $35 - $40 for one in excellent condition).  I use the 4.5 L size glass pot to bake my chicken and then to make my broth.  I used to recommend Le Crueset pots to make bone broths but they are easily scratched, hard to clean, and do not hold up well over time.  You can also bake your chicken in a ceramic baking dish and then make your broth in a ceramic crock pot.

Ingredients:

1 whole free-range chicken (do not use a conventional chicken from the grocery store)
cheap sea salt
1 - 2 Tbl extra virgin organic olive oil
1 tsp good quality sea salt
1/2 - 1 organic lemon, quartered
1/2 - 1 small yellow onion, quartered
2 sprigs (about 4" in length) of fresh rosemary


Remove chicken from packaging, and remove inner bag with neck and pieces (if it contains them).  Rinse the inside and outside of the chicken thoroughly with cold water.  Then sprinkle inside with cheap sea salt and let sit for about 5 minutes.  Next thoroughly rinse the inside and outside again.


Then dry the outside of the chicken with paper towels.  Place in ovenproof pot or dish.  Fill cavity with lemon and onion chunks and springs of rosemary.  Be sure to use at least 1/2 of the lemon.


In a small dish, mix the 1 tsp of good quality sea salt with 1 - 2 Tbl of olive oil (I use Celtic Sea Salt Vital Mineral Blend, which is a slightly course sea salt, pictured on the right in the photo in this post).  The amount of oil needed depends upon the size of the chicken.  A larger chicken is not better.  Look for a bird that is 3 to 4 pounds.  Anything larger than that is probably not the best quality chicken because it has been bred to grow too quickly and has not been able to free range.  Using your fingers, rub the oil/salt mixture all over the outside of the chicken, coating evenly. 


Place the lid tightly on the glass baking pot (if you don't have a lid, you will have to be much more careful watching the chicken to ensure it is cooked but not overcooked and thus dried out).  Bake at 350 °F for 1 hour and 45 minutes or until meat is done if using a covered glass pot.  Remove from oven and allow to cool.  When cool enough to touch, remove the meat from the bones and use for a meal or to make healing chicken soup.  Meat can be stored in the refrigerator for several days or frozen for several months.

Save all the juices, skin, and bones, everything but the meat, for making bone broth (tomorrow's post).


Wednesday, March 27, 2013

Chicken Sausage Gumbo


We love this dish.  Sometimes I make it chicken ham gumbo, or this time I had no sausage, so I just made chicken gumbo.  The addition of an andouille type sausage that you can cut into slices is very good but not an essential ingredient.  Be sure to buy good quality nitrate-free sausage or ham. 

The spices, especially the white pepper, thyme, and celery seed, are essential.  The essential vegetables are celery, green pepper, and onions.  Gumbo also needs a roux or thickener (a flour and water mix or okra, in the summer when in season is excellent choice).  To make a roux, melt 2 Tbl of butter in your pot and when hot add about 2 Tbl of flour and stir until thick and beginning to brown.  This batch I made the quick way and just dissolved the flour in water and added it to the pot instead of making a roux at the beginning.  Not a traditional Cajun version, but delicious anyway.

Ingredients:

2 - 3 cups cooked, shredded chicken
1 - 2 cups cooked, sliced sausage or ham
1 Tbl extra virgin olive oil (or 2 Tbl butter, see above)
1 yellow onion, diced
2 green onions, chopped
2 jalapenos, diced fine
1 green (or half green/half yellow) bell pepper
5 celery stalks, diced
3 garlic cloves, minced
3 cups homemade chicken broth
1/2 cup filtered water
2 Tbl pastry flour
1 bay leaf
1 tsp parsley
1 tsp sea salt
1/2 tsp oregano
1/2 tsp black pepper
1/2 tsp white pepper
1/4 tsp cayenne pepper
1/4 tsp celery seed
1/4 tsp thyme

Yellow Rice

Heat 1 Tbl olive oil in heavy pot (or 2 Tbl of butter with the flour to make a roux).  Add diced vegetables and saute for several minutes.  Add chicken broth and spices.  Bring to a slight boil.  (Mix flour with water and add to pot unless you started with the roux).  Add meats. Cover partially with lid.  Simmer for 1 to 2 hours.  Serve over yellow rice with a salad and sweet potato biscuits.


Tuesday, March 26, 2013

Weekly Challenge - Week 13 (3/26/13)

Enjoy a "100% God's Food" meal with a friend.


Though possibly scary, I hope this is a fun one!  Plan and prepare at least one "100% God's Food" meal this week and invite someone over to share it with you (or if this would be a special treat for your family - share it with them).  Cook from scratch with none of the foods/ingredients on the 'avoid list'.  Find and buy the best quality ingredients available.

Hopefully you have been sharing what you are doing, and thus your friend(s) that you invite over, will be thrilled to enjoy a few new recipes with you.  If you are not sharing what you are doing with others and have not sought support of family and friends, please be sure to read these posts.  It is so important to your long term success to you have the support and encouragement of your family and friends.

Advanced Challenge:  Go 100% this week with all of your meals, eating only God's foods!

Have a wonderful Easter and God bless each of you!

Mary


Monday, March 25, 2013

Roasted Potatoes and Sausage Quick Meal


This is another favorite '30-minutes or less' meal that we love and that is very filling for hungry teenagers.  Whenever I make Oven Roasted Potatoes, one of our versions of french fries, I make extras so that I can have this quick easy meal a few days later.  This dish is a little different each time I make it, depending upon which sausage was on sale and what type of beans I have cooked that week.  Quantities are not important; experiment and use what you have.

Ingredients:

1/2 - 1 onion (yellow or red), chopped
2 - 4 cloves garlic, minced
1 Tbl extra virgin olive oil
3 - 4 sausages (I buy Whole Foods freshly made sausage links in the meat case)
2 - 4 cups leftover Oven Roasted Potatoes
~ 2 cups cooked or 1 large can beans (black beans are great in this, pinto and Anasazi are shown in the photo)
6 - 8 free range organic eggs
1 tsp kelp (I use Sea Seasonings organic kelp granules)
1 Tbl milk


Remove sausages from casing and brown in a heavy skillet (do not use nonstick cookware).  Remove from skillet and place on a ceramic plate layered with a paper towel to remove excess grease.  Wipe excess grease out of skillet.  Bring skillet back to medium heat and add 1 Tbl olive oil.  Saute the onion and garlic for a minute or two and then turn heat to low.  Add back into the skillet the sausage.  Also add leftovers potatoes and beans and stir occasionally to heat thoroughly. 


Crack eggs into a bowl.  Add ~ 1 tsp of kelp granules and ~ 1 Tbl of milk, and whisk together.  Heat a second skillet  to medium heat (again don't use a skillet with a non-stick coating - a good quality cast iron skillet as shown in the photo above is the best - this is the original non-stick skillet).  Grease well with butter and pour in eggs.  Let sit a minute before you start to turn.  Scramble and cook eggs and then add scrambled eggs to heated potato mixture.  Serve immediately.  Leftovers make a great second meal.


Sunday, March 24, 2013

Lynn's Baked Chicken Wings


Baked Chicken Wings is my friend, Lynn's, favorite family quick meal.  The quality of the chicken wings that you buy is extremely critical to this recipe.  This meal takes just a little planning because you need to have some thawed chicken wings, but it is extremely quick and easy to make.  Serve with a side of quinoa with almonds and celery or a salad.  Leftovers (if you should happen to have any!) are great reheated or cold.
When I asked Lynn about her favorite "30-minute or less meal" was this is what she said, "This is one of my family’s fun meals, the recipe that I make when I am tired or short on time.  It is also one of our favorite meals, our version of “Friday Night Pizza”.  I serve it with oven baked fries.  There are two secrets to this recipe: 1) Purchase good quality wings from Whole Foods or a local ranch  (do not use grocery store wings as the flavor will not be the same) and 2) Remember to thaw the wings ahead of time (to quickly thaw if you have forgotten, you can place them in a ziploc bag and soak in a sinkful of water for a couple of hours)."

Ingredients:

3 pounds of good quality chicken wings  (this amount will feed 5 adults)

Toss 3 pounds of chicken wings, patted dry with a paper towel, with the following:

2 Tbl dehydrated onions
2 Tbl dehydrated garlic (6 crushed garlic cloves – as many as a head!)
2 Tbl paprika (or 1 Tbl paprika, 1 Tbl smoked paprika)
¼ tsp chili powder (or Lynn uses 1 or 2 tsp of crushed chili peppers - they like things spicy)
2 tsp sea salt
1 tsp freshly ground pepper

Mix dry spices together in a large bowl.  Pat dry the chicken wings with a paper towel and place in bowl with spices.  Toss until chicken wings are well coated.  Let rest for a few minutes, if in a hurry, to a few hours to marinade (place in the refrigerator).

Lay the wings next to each other on parchment paper on a cookie sheet,  spaced about 1” apart.  Bake at 425 F for 30-40 minutes, until cooked golden and crisp. 


Saturday, March 23, 2013

Tom's Quesadillas


When I first met with my team, I asked how they thought I could best help others making the transition from eating the standard American diet to a diet of 100 % God's food.  Kris suggested that I provide ideas and recipes for quick 30-minutes or less meals. 

This was a brilliant suggestion and I am going to start with my family's favorite, quesadillas.  In fact, this is one of our 'emergency' meals.  You must have a few back-up meals on hand at all times, so that when things don't go as planned, you can still quickly pull together a meal for your family.  Not only will it be more nutritious, it will save you money if you don't have to run to Sonic, order a pizza, or buy the prepared dinner at the grocery store.

Quesadillas became my family's favorite because they became my son, Tom's, favorite. He learned how to make them so that whenever he is hungry he can make himself one.  Not only does he make his own quesadillas when hungry, he also makes the yellow rice and refried beans from scratch that are used in them.  When we run out, he makes up another batch of each.  Best of all, he cooks lunch or dinner for the whole family when we have this as a meal, typically once or twice a week.  It is his speciality now!  Involve your children and teach them to cook using God's foods, so they will have this knowledge when they are grown and on their own.

We keep packages of tortillas in the freezer, and always have a bowl of cooked rice, a bowl of refried beans, and white cheese in the refrigerator.  These are the keys ingredients for this simple, quick meal.

Ingredients:

whole wheat or whole grain tortillas
green onions, chopped
organic salsa
Monterrey Jack or other white cheese, shredded (shred your own)
avocado

Optional (add what you like and have available):
bell pepper slices
mushrooms
shredded chicken
taco meat


Preheat a griddle or skillet (we use a cast iron griddle). Place tortilla flat on a plate and spread refried beans on half.  Then layer with yellow rice, green onions, salsa and other optional ingredients of your choice.  Lastly place a layer of shredded cheese on the top.  Fold in half and place on griddle (no oil or grease needed).  Heat until slightly browned (about 5 minutes depending upon temperature), and carefully flip over.  Heat for an additional few minutes until both sides are slightly browned and the cheese is melted.  Then, if desired, open up gently and place avocado slices inside and then close back up the tortilla.  Enjoy by themselves, with a side salad, or with carrot sticks.

Friday, March 22, 2013

It's all about quality


Quality is one of the most important things to understand in today's world of commercial factory farming.  The above slide is from the classes I taught five years ago.  Nothing has changed except the scope of commercial factory farming has increased, and the quality of the food produced has decreased.
 
On the right is a photo I took of some of our chickens in 2007.  I think everyone would agree that there is a world of difference in the quality of the eggs produced by the chickens confined to cages and those free ranging on green grass and bugs.  (In addition, I also make my own soy-free chicken feed which includes sprouted organic grains.)  We can see and taste the difference in the eggs.
 
Unfortunately, when we shop at the grocery store, we are completely out of touch with how the food was produced.  It is easy to read labels and see what is not a good choice, but what about foods like eggs, meats, fish, produce, etc.  How a food is grown or raised is also very important.  That is why I frequently say to buy the best you can afford.  Find the local farmers and ranchers; we have many in the DFW area.  Support these people who are producing better quality foods.
 
This is what I wrote five years ago, it is still true:
 
I cannot stress enough that the factor which determines if a food is nourishing is its quality.  How was it grown, raised and processed?  Eggs can be healthy or unhealthy.  Yogurt can be healthy or unhealthy.  Salmon can be healthy or unhealthy.  This is true for just about all of the foods we eat.  The meat in most stores has been raised at a commercial factory farm.  The animals are fed cheap feeds and by-products, not their natural diet.  They are living in very close, unsanitary, cramped spaces.  They are genetically modified or given hormones to grow faster or increase their production, and they are given a low dose of antibiotics to keep these sick creatures alive until they can be processed.  Factory farm products do not provide healing nutrients. 
Yogurt contains the natural bacteria needed for a healthy gut.  However, many yogurts contain additives, are loaded with refined sugar, and contain very little of the good bacterias.  So blanket statements such as “yogurt is good for you, or beef is bad for you” are inaccurate.
It is very important to learn where your food comes from and how it has been processed.  This can be a huge task, so I hope to help guide you through the initial, basic points. 
God’s nourishing food supply has been around for centuries.  Try to eat foods as supplied in nature or those with minimal processing.  Use the ‘old’ ways of cooking and preparing foods starting with fresh ingredients from scratch.  I will teach you the basics of cooking and baking.  From there, you can choose to cook very simple meals, or you can create delicious gourmet meals.  As long as you use God’s foods, either works to gain and maintain health.
 
Lots of great foods are available to us, but these foods are not found at the typical local grocery store.  Be careful of misinformation that you might receive from the grocery store.  After Tuesday's class, someone asked Kroger if they had organic chickens.  The response was, that "he had 100% natural and the only difference is that an organic chicken is let out of the cage for the last 30 days of its life. He said that they are fed the same food."  I disagree that the two are fed the same feed, but even if they were, think about this.  Chickens have been bred to live in low-light conditions and to fatten up VERY quickly.  Instead of taking months to grow to full size, it now takes weeks.  Typical age when butchered is 5 to 7 weeks.  Chicks, commercial and free range, are kept in a brooder until they feather out for the first 7 to 10 days of life.  So this would mean from Kroger's answer about the chickens, that the 100% natural chicken lives it's entire life in a cage.  Actually, they are not kept in individual cages as the egg layers, which are shown above.  Broilers wings are clipped and they are all kept together in large rooms, such as this.


Buy the best quality that you can.  Buy local and ask questions about how their products are raised or grown.  Here are a couple websites to get you started. Google, search, ask around. 

http://www.eatwild.com/products/texas.html
http://www.localharvest.org/
http://www.ediblecommunities.com/dallasfortworth/farmers-markets/farmers-markets.htm


Thursday, March 21, 2013

Chili


Make a large batch of chili so that you have some leftover to put in the refrigerator for a meal later in the week or to put as individual size meals in the freezer.  Chili is one of those foods that improves with time and so can taste better when you reheat it for a second meal.  In fact, I forgot to take the photo of the chili until I had only one bowl left that I was eating for lunch, already dished up ready to stir in the rice that is on the bottom.
 
Customize your chili recipe for your family (use only good quality real ingredients).  I usually add other vegetables (diced) that we had on hand.  Try the standard recipe and then adjust.  Adjust slowly if your family is not into eating vegetables in their foods yet.  Add a little bit of something, chopped up finely.  Don't tell them what you are doing, and their taste buds will slowly start to change, and then soon they will be enjoying (hopefully) a much greater variety of flavors.
 
About 3 years ago, I started cooking dry beans instead of using canned beans.  We can taste the difference (improved flavor), and they are much less expensive.  The key to cooking dry beans is not to use beans that are over 6 months old.  Old beans never soften.  (If you have old beans and live in the Dallas area, please don't throw them in the trash - I will take all of your old beans to feed to my chickens!)  I will be showing you how to cook beans soon.
 
Ingredients (I use all organic ingredients):
 
1 1/2 Tbl. chili powder
1 tsp ground coriander
1 tsp ground cumin                          (I use all organic spices)
1/2 tsp oregano
1/4 tsp cayenne pepper
 
1 lb. 100 % grass-fed ground beef
1/2 - 1 yellow onion, chopped
2 cloves fresh garlic, minced
1 large can (28 oz) diced tomatoes (I like Bionaturae or Muir Glen fire-roasted)
1 can (15 oz) tomato sauce (I use ~ 1/2 bottle of Bionaturae Strained Tomatoes)
1 can (15 oz) kidney beans (or ~ 1 1/2 cups cooked)
1 can (15 oz) pinto beans (or ~ 1 1/2 cups cooked)
1 large can (25 oz) black beans (or ~ 2 1/2 cups cooked)
 
Mix together seasoning.  Cook ground beef and drain (I place the ground beef on a ceramic plate between paper towels).  Saute onion and garlic with 3 tsp of the seasoning mix.  Add tomatoes, tomato sauce, beans, cooked ground beef, and the rest of the seasoning mix.  Cook on low heat for 1 - 6  hours (add smashed bean option if you don't have at least an hour cook time available).
 
Optional:  Place ~ 1/2 cup of kidney and ~ 1/2 cup of pinto beans in the food processor or smash with a fork.  Add the smashed beans to the chili at the beginning of the cook time when you add the whole beans.  This step gives the chili a wonderful thick texture.  This is good to do if you don't have several hours for your chili to simmer before eating.
 
Serve over brown or yellow rice and, if you wish, top with grated raw milk cheese or a yogurt sauce.
 
Some optional vegetables you can add are chopped mushrooms, jalapeno peppers, bell peppers, zucchini, or winter squashes such as butternut.  Or make it with steak instead of ground beef. 

Wednesday, March 20, 2013

Quinoa with Celery and Almonds


This quinoa dish is a quick, simple, yet delicious side-dish.  Quinoa (pronounce KEEN-wah) is a great addition to your diet. 

Ingredients:

2 cups filtered water
1 tsp organic turmeric
1 tsp sea salt
1 cup quinoa
1/4 to 1/2 cup raw almonds, chopped coarsely
3 - 5 stalks of organic celery, diced
2 Tbl fresh parsley (optional), chopped finely

In your rice pot (a heavy pot with a tight fitting lid), place the water, turmeric and sea salt.  Bring to a boil.  Add the quinoa and bring to a second boil (keeping lid on tightly).  Let boil a minute or two longer, and then turn off the heat and move the pot off the hot burner (keep lid on tightly).  Let sit for 15 to 20 minutes.

In the meantime, chop up almonds, celery and parsley. 

When ready to serve, remove lid from pot and fluff the quinoa with a fork.  Stir in the almonds, celery and parsley and serve. 

Tuesday, March 19, 2013

Weekly Challenge - Week 12 (March 19, 2013)

Be a member of the 'Clean Plate Club' - don't waste food.


Thank you, Julie, for modeling our challenge for us this week!  Growing up, I was taught to be a member of the 'Clean Plate Club'.  I think I am showing my age, because then in the 80's and 90's, it became vogue to leave a bit of food on your plate.  I guess it was a sign of self control in a society of people becoming obese.  But it is a sign of nothing more than arrogance and wastefulness and worst yet, that subconsciously we know that the fast food we are eating in school cafeterias, buying at grocery stores, and ordering at restaurants is garbage for our bodies.
 
Don't waste food.  Some thoughts on what this encompasses.

1.  Teach your children and yourself to take a small portion of each food choice - if you have never tried something before take just a teaspoonful the first time.  You can always go back for seconds.  Then if you don't like it, you won't be leaving uneaten food on your plate.  Luckily, what one person doesn't like, often another one in the family will love.  For my boys, when they were little, they learned to eat everything on their plate (they finished everything on their plates, which was a little of all items served, before they could go back for seconds of the things they loved).

2.  Plan your meals and know what you have in your refrigerator and freezer.  Use the produce and foods that you are buying.  Put the newly purchased grocery items in the back and then use what is in the front first.  Typically most items last from several days to a week or two in the refrigerator.  Raw meat lasts a day or two, dishes you prepared typically last about 5 days, and things like carrots and celery can last a couple weeks.  (I store my potatoes and onions, which last a couple weeks, in a dark drawer in the utility room, not in the refrigerator.)  Items can be frozen for months.

3.  Save what is not eaten at a meal and plan 'leftover' meals.  Often, I make extra ingredients (such as roasted potatoes or taco meat) that are then added into a new dish so it does not seem like we are having leftovers and I have a quick, easy meal that is delicious.  Or else, I make one new item (a salad or biscuits for instance) to go with the leftovers.

4.  Leftovers are often great for lunch - take advantage of that delicious real food that you created.

5.  Finish off the perishable items first at a meal.  Things like salads don't keep well or for long, so have seconds of those rather than the chicken that you can use in another meal.  If you have teenagers, have them eat the perishable items before they have seconds of the other foods.  Hungry teenagers can be coaxed into eating just about anything!

6.  Save money by learning to use all of the food you buy.  You also become a wise steward of the land when you don't throw away food.  The amount of food thrown in the trash in the United States is nauseating.  Don't be a contributor to the problem.

7.  Take all of those unopened foods that  have ingredients on the 'Foods/Ingredients to Avoid List' to a food pantry.  Replace them with good quality real foods and plan your meals wisely using what you have on-hand.  Then teach your family to appreciate these wonderful, delicious foods and to not throw away uneaten food.  You will reap the benefits.
 
"The highest heavens belong to the Lord,
but the earth He has given to mankind."  Psalm 115:16